Managing exchange email distribution lists manually is tedious, especially during onboarding. In this post, I’ll show you how to add members to a distribution list using Power Automate — and how to check if a user already exists. Whether you’re feeding this from a Power App or Microsoft Form, it’s easily achieved with a single action.
Update January 2023
I’ve written a new bog post detailing how this can be achieved with PowerShell and an Azure Runbook. Check it out here Add user to Distribution List - DamoBird365
Update November 2021
Whilst it is still possible to list group members of a Distribution or Mail Enabled Security Group, changes have been made to the Add member to Group Action, preventing members from being added. This was highlighted in recent comments. I will continue to monitor the situation and if things change or I become aware of another method, I will update this post to reflect how. Note the error received is “Cannot Update a mail-enabled security groups and or distribution list.” and has been commented on as a bug but now confirmed as an intended feature, here.
-END OF UPDATE-
Finding Your Distribution List ID
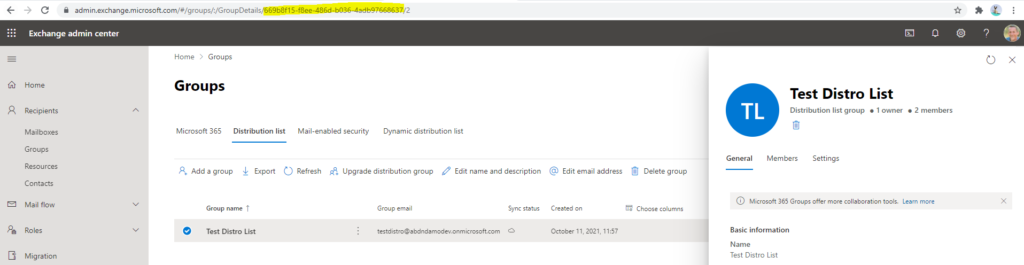
First of all, you must know your Exchange Distribution List ID. This can be achieved by navigating to Exchange Admin Center, selecting Recipients, Groups, and selecting your Distribution Group. In the example below I have chosen my “Test Distro Group” and highlighted the Group ID in the URL. Please note that this process applies to Security Groups too, albeit the ID must be obtained from Azure Active Directory.
Adding a Member via Power Automate
Now all you have to do is fire up Power Automate, choose your trigger, and click on the next step, then search for “Add member to group”. This action will allow you to supply the ID from above via “Enter custom value” and then all you have to supply is the User Principal Name, which is basically the user’s email.

Putting It All Together
Run your flow and that is all there is to it! You can now set up your Microsoft Form or Power App with a list of Distributions lists and your managers or users can request that they are added to distribution lists without the need for IT to be involved.
Retrieving a list of users in a Distribution List or Security Group
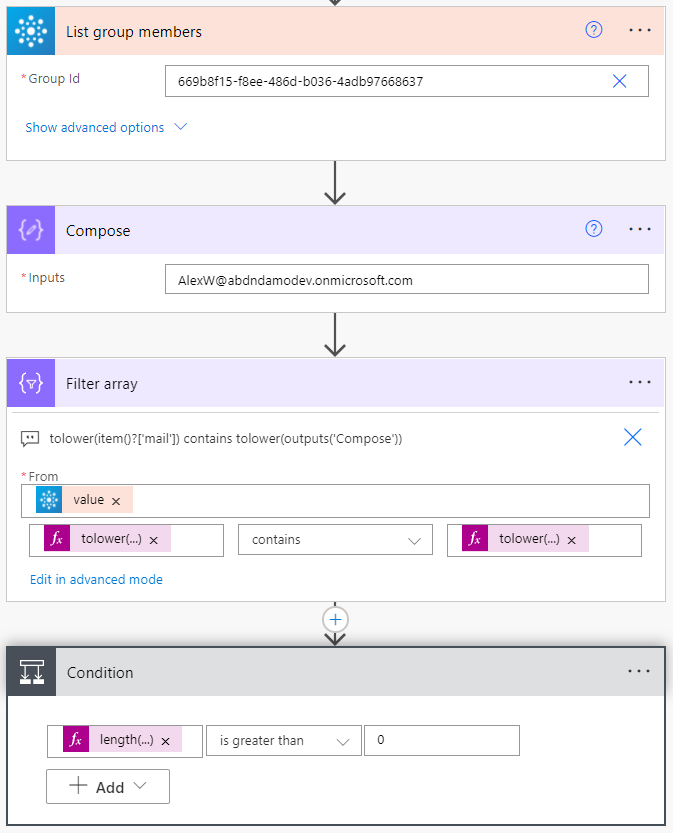
Ok, now that you have added a user, what if you want to check to see if a user already exists in the distribution list? Using the List Group Members action and the guid from before, we are able to obtain an array of users, including Display Name, Email, Job Title and a few other items. Now if we want to check that a user exists, using the email that I have manually provided in a compose (albeit you might want to take an email dynamically from a form submission or other means) we can perform a filter array action (note that I convert both strings tolower() as string comparisons are case sensitive). Using the Length() expression on the filter array, we are able to check if there is more than 0 results or maybe you would prefer to check the result equals 1? Either way, the outcome would be yes and you therefore know that the email already exists in the distribution list.
User Emails as an Array or List for Approvals or Sending an Email?
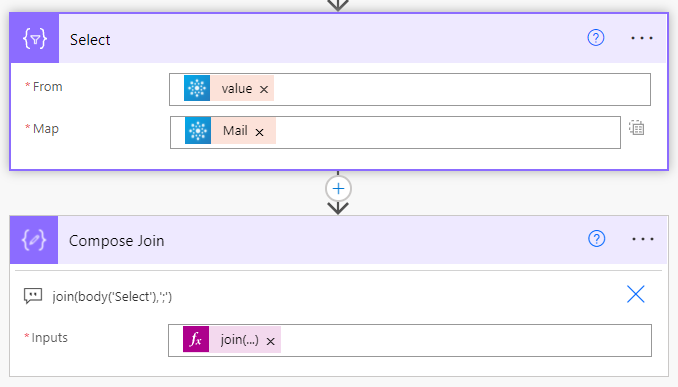
If you are just looking for an array of emails to use in an apply to each loop, or maybe a list of emails for an approval process, you can use a select action to create your array, or the results of the array with a join() to create your semi colon-separated list.
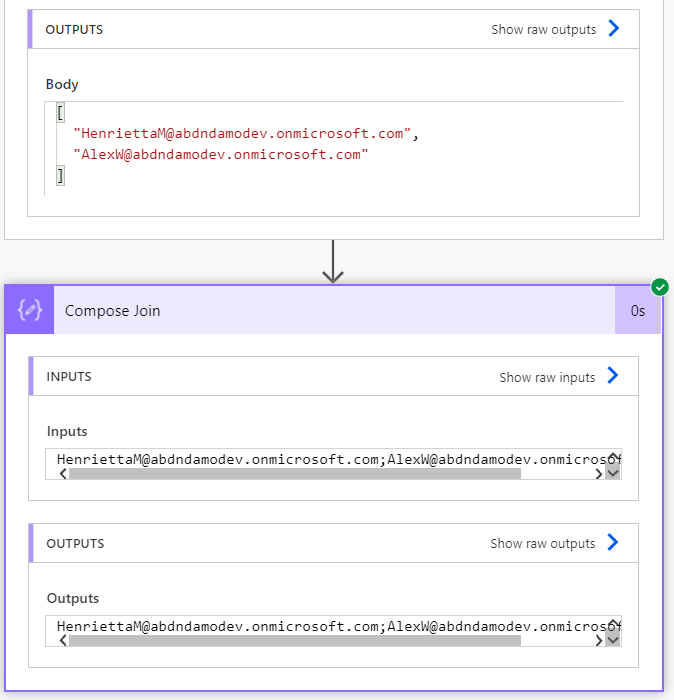
The output of both actions would appear like so:
Don’t forget - this works just as well on an Azure AD Security Group!