Ever since Microsoft removed the ability to add users to Exchange Distribution Lists via the Graph API, Power Automate users have been stuck. In this post, I’ll walk you through a workaround using PowerShell and Azure Runbooks to get distribution list management back into your flows. It’s been over 12 months since I wrote my blog post Add members to a distribution list – Power Automate where initially it was possible to add members directly. That functionality was removed by design and has never made a comeback. Fortunately, I came across PowerShell commands to both add and remove users from a distribution group — and we can bring this to an Azure Runbook. For more details on the Graph API limitation, see Working with groups in Microsoft Graph.
Update 11th March 2023
When I wrote this updated blog post in January 2023, it was possible to achieve this but when I set it up live for a video recording, it didn’t work and I thought that the distribution list cmdlets for Exchange Online had been removed from the Cloud Based service. Add-DistributionGroupMember (ExchangePowerShell) | Microsoft Learn.
Via twitter another couple of users appear to confirm that this still works. I am trying to find time to re-test and then release a video of it all working 👍
https://twitter.com/CloudProtectNja/status/1634658495914991620?ref_src=twsrc%5Etfw
The Solution
With an automation account on Azure, you can write PowerShell Runbooks. In this case I have written two very simple scripts that accept the distribution group name and member email address as parameters. We can view these Runbooks from our Automate Account:
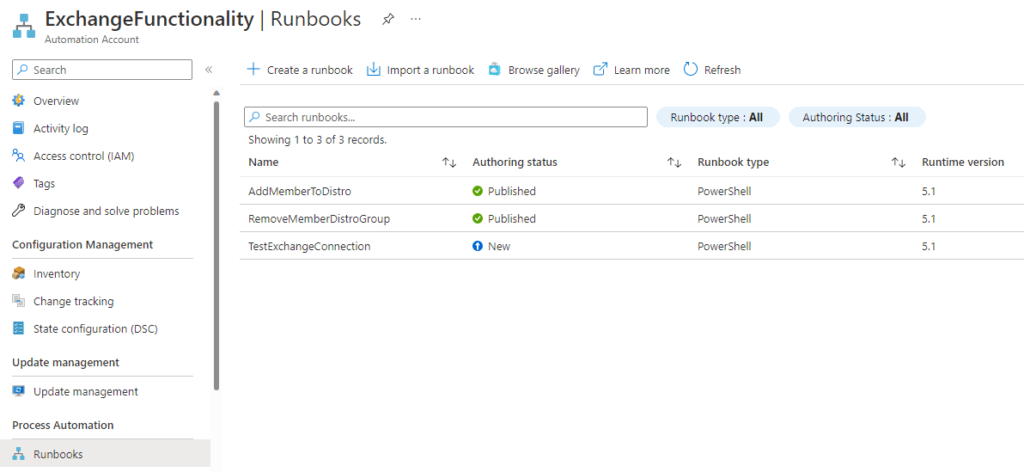
Below we can view the code to both add and remove a member to/from a distribution list on Exchange.
<#
    .DESCRIPTION
        A sample script to add a user to a distribution group

    .NOTES
        AUTHOR: Damien Bird
        LASTEDIT: 9th January 2023
#>

param(
[string]$DistroGroup,
[string]$Email
)

try
{
    "Logging in to Exchange..."
    Connect-ExchangeOnline -ManagedIdentity -Organization abdndamodev.onmicrosoft.com
    "Adding user..."
    Add-DistributionGroupMember -Identity $DistroGroup -Member $Email
    "User Added"
}
catch {
    Write-Error -Message $_.Exception
    throw $_.Exception
}
<#
    .DESCRIPTION
        A sample script to remove a user from a distribution group

    .NOTES
        AUTHOR: Damien Bird
        LASTEDIT: 9th January 2023
#>

param(
[string]$DistroGroup,
[string]$Email
)

try
{
    "Logging in to Exchange..."
    Connect-ExchangeOnline -ManagedIdentity -Organization abdndamodev.onmicrosoft.com
    "Removing user..."
    Remove-DistributionGroupMember -Identity $DistroGroup -Member $Email -Confirm:$false
    "User Removed"
}
catch {
    Write-Error -Message $_.Exception
    throw $_.Exception
}
Calling Runbooks from Power Automate
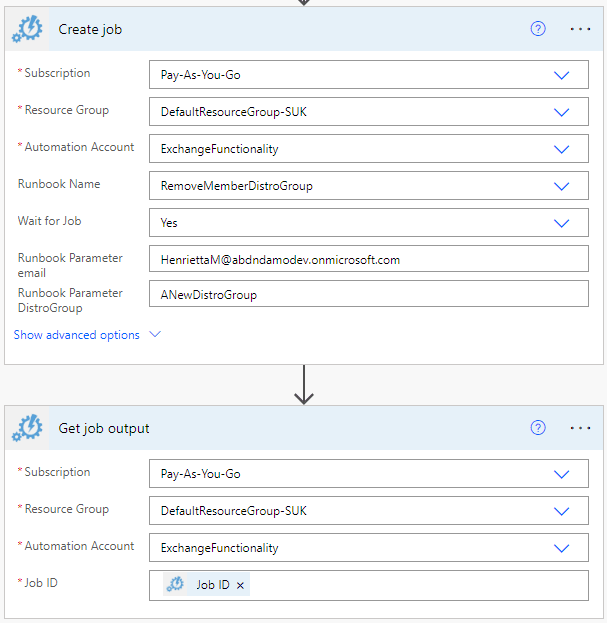
In order to call these Runbooks from the Power Platform, we have a few options that I am aware of. The first most straightforward one is the Azure Automation connector which allows you to run a job on Azure. Below we can see two Power Automate actions to remove Henrietta from our New Distro Group. We simply Create a job and check the output of the jobs Success.
Alternative Integration Options
The other option available to us are adding a webhook to the function and calling it direct Start an Azure Automation runbook from a webhook | Microsoft Learn or using API Management Import an Azure Function App as an API in API Management - Azure API Management | Microsoft Learn, and build a custom connector so that we can easily call the new function from across the Platform using actions Power Platform connectors overview | Microsoft Learn.
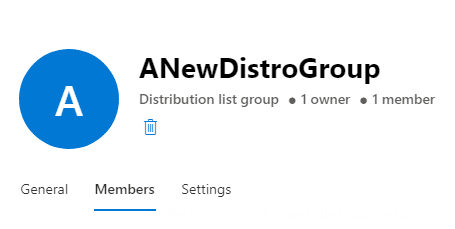
As the Azure Function to add or remove members is run, the distribution group is updated to reflect any changes.
The setup
We need to setup 3 things:
- An automation account, to run our RunBooks
- A managed identity to enable access to Exchange via PowerShell
- Our Runbooks, to run our PowerShell scripts
How to setup a Managed Identity
Thankfully the documentation for this is good and it can be achieved with a combination of PowerShell and Azure Portal. You will need to install the Azure Az PowerShell and Graph SDK in preperation. In summary:
- Create an Automation account, in my case I called it “ExchangeFunctionality” Quickstart - Create an Azure Automation account using the portal | Microsoft Learn
- Save the GUID of your managed identity into a variable in PowerShell $MI_ID
- Add the Exchange Online PowerShell module to the managed identity via the Azure Portal. This is a case of adding a module “ExchangeOnlineManagement” to your Automation account.
- Connect to Graph via PowerShell and grant permissions for the managed identity to call Exchange Online.
- Assign an Azure AD role to the managed identity that fits with the permissions of your script. This is a combination of Azure Portal to assign and PowerShell to confirm. Albeit in my case the PowerShell failed as the Management Directory Role had already been assigned.
Setting up the Runbook and PowerShell Scripts
Another process that’s well documented Manage runbooks in Azure Automation | Microsoft Learn and I have a previous demo from February 2021 where I brought the ability to enable/disable external sharing on SharePoint to Power Automate Power Automate meets PowerShell in Azure. The basic scripts for this process are shared earlier in this article.
What other use cases have you got for Azure Runbooks? Did you use the Azure Automation connector, webhook or API Management? Please let me know in the comments below.